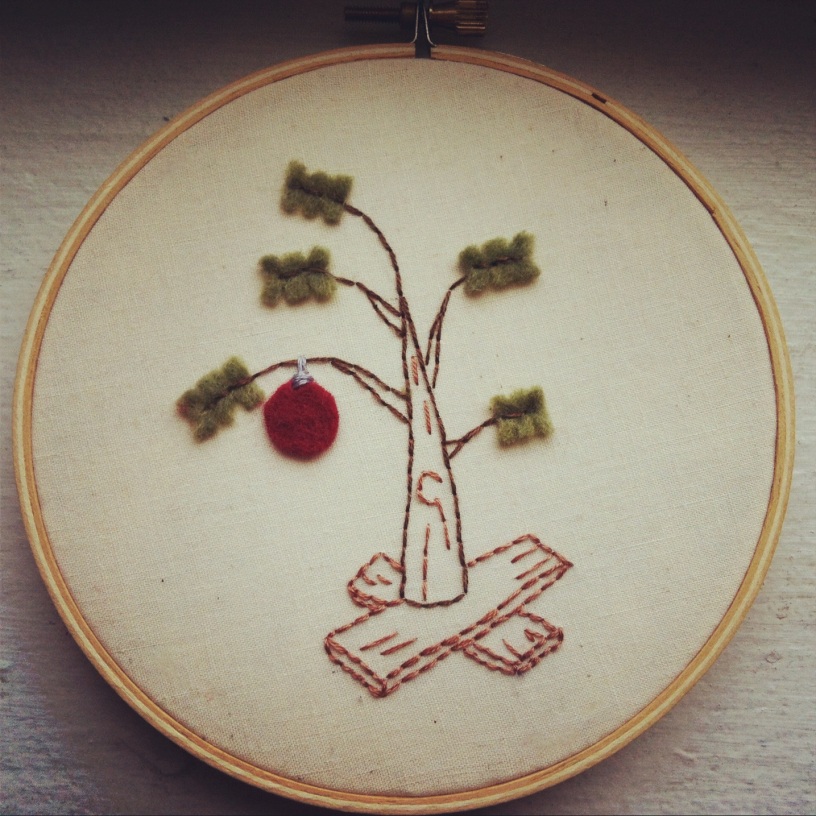

Charlie Brown Christmas Tree Embroidered on a Hoop – Handmade Gift by StitchNSift
Who doesn’t love Charlie Brown’s Christmas tree? We’ll soon see. I made a couple of these little guys this week to give away as holiday gifts.
Step by Step:
- I drew a template based off the photos I found in google images for ‘Charlie Brown Christmas Tree’

Sketch of Charlie Brown Christmas Tree I made as a template for my embroidery project.
- I stretched 2 pieces of ironed fabric in a 4″ hoop (in this case a natural cotton with little specs that I had in my sewing kit). The fabric was very thin, which is why I doubled it up.
- I used a silver fabric pencil to sketch the design on the stretched fabric.
- I cut a strip of green felt, to use for the pine needles. And cut a circle out of red felt for the Christmas ball ornament.
- I picked out my colors. In this case 2 colors of brown for the tree and tree stand. I also used a silver/grey to ‘hang’ the ornament.
- Then I started to embroider. I believe I used 3 strands for the trunk, 1 or 2 strands for the grain. 4 strands for the ornament hanger.

The charlie brown christmas tree starting to be embroidered.
- I sewed the ornament on just by the top. Also, the green felt for the pine needles, I embroidered them on with 2-3 stitches. Then I took scissors and made a couple cuts on each side and then took my fingernails and pulled them apart a little.
- Finally, I used Modge Podge (because my fabric glue was hard as a rock) to glue the sides of the extra fabric inside the hoop. Then I took a piece of hard felt (not sure what it’s really called, but it is ridged felt that I bought at Michaels a while ago) and cut a circle, to cover the back, and my messy embroidery.
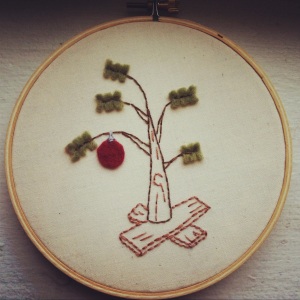


Now you’re done. And everyone can enjoy this little Christmas tree wherever they are…on the road, on their desk, in their home. Take a little Christmas with you. You could take a ribbon and hang it from your tree.